Climbing skins might not be the most glamorous part of your gear, but they’re essential for powering up the mountain. The right ski skins can make or break a day in the backcountry. This guide will help you choose the right type of skins, teach you how to trim and attach to your skis and keep them gliding for tours to come.
Types of Ski Skins
Climbing skins are a must-have piece of gear when venturing into the backcountry. These strips of plush fabric stick to the bottom of your skis or splitboard to provide traction as you glide uphill. Most modern skins are crafted from a blend of mohair and nylon—mohair adds smooth glide, while nylon ensures solid grip. The ideal climbing skin strikes the perfect balance between these qualities, so you don’t have to compromise one for the other.
In most cases, you’ll be looking for ski skins or splitboarding skins as attachments to your touring setup. The adhesive side is usually made of some type of glue, and the plush side is made of either mohair, nylon, or a synthetic blend. There are glueless skins, like Pomoca skins, but most continue to use glue.
- Nylon Skins: Highly durable with excellent traction at an affordable price, though they lack the glide efficiency of mohair.
- Mohair Skins: Offer an excellent balance of grip and glide while being lightweight for fast ascents, but they tend to be less durable and come with a higher price tag.
- Mixed Skins: Best of both worlds, balancing durability and glide with grip and weight.
Top 5 Ski Skins for Backcountry Skiing
The Pomoca Climb Pro S-Glide is a popular skin that strikes all the right balances of grip, glide and glue.
Best for steep ascents: Made with a mohair-nylon blend, it provides lightweight performance and grippy resistance even on steep hardpack.
Why we love it: The easy-to-use attachment system ensures a secure fit, ideal for those seeking efficiency and versatility in their touring setup.
Price: 0.00$
Brand Name | Product Type
Brand Name | Product Type
The Pomoca Climb Pro S-Glide is a popular skin that strikes all the right balances of grip, glide and glue.
Best for steep ascents: Made with a mohair-nylon blend, it provides lightweight performance and grippy resistance even on steep hardpack.
Why we love it: The easy-to-use attachment system ensures a secure fit, ideal for those seeking efficiency and versatility in their touring setup.
Price: 0.00$
The Pomoca Free Pro is a high-performance skin designed for freeriders who prioritize speed and weight savings on their tours.
Best for faster backcountry routes and performance: This fast, low-profile skin features a formulated plush blend with just the right amount of grip.
Why we love it: You get super-fast ascents with exceptional glide. And, the ultralight, compact design means they easily pack small enough to fit into your jacket pocket.
Price: 0.00$
Brand Name | Product Type
Brand Name | Product Type
The Pomoca Free Pro is a high-performance skin designed for freeriders who prioritize speed and weight savings on their tours.
Best for faster backcountry routes and performance: This fast, low-profile skin features a formulated plush blend with just the right amount of grip.
Why we love it: You get super-fast ascents with exceptional glide. And, the ultralight, compact design means they easily pack small enough to fit into your jacket pocket.
Price: 0.00$
The Black Diamond Glidelite Mix FL ski is designed for extended ski tours, offering an ideal mix of lightweight efficiency and durability.
Best for long backcountry trips: The 65/35 mohair-nylon blend ensures a smooth glide for covering long distances while maintaining a reliable grip on challenging ascents.
Why we love it: Light and packable, the fine-tuned blend gives us the perfect balance of grip and glide to save energy during lengthy uphill travel.
Price: 0.00$
Brand Name | Product Type
Brand Name | Product Type
The Black Diamond Glidelite Mix FL ski is designed for extended ski tours, offering an ideal mix of lightweight efficiency and durability.
Best for long backcountry trips: The 65/35 mohair-nylon blend ensures a smooth glide for covering long distances while maintaining a reliable grip on challenging ascents.
Why we love it: Light and packable, the fine-tuned blend gives us the perfect balance of grip and glide to save energy during lengthy uphill travel.
Price: 0.00$
Crafted from natural mohair, the Pomoca Climb Pro Mohair climbing skins provide silky smooth gliding performance for advanced and multi-day ski touring.
Best grip for icy terrain: Cold, dry, and soft snow conditions is where this skin shines. The light and supple mohair plush makes you feel like you’re flying over the snow.
Why we love it: A gracefully fast ascent maximizes snowy face shots. Durability takes a small hit, but the phenomenal climbing efficiency makes for a full day of powder laps.
Price: 0.00$
Brand Name | Product Type
Brand Name | Product Type
Crafted from natural mohair, the Pomoca Climb Pro Mohair climbing skins provide silky smooth gliding performance for advanced and multi-day ski touring.
Best grip for icy terrain: Cold, dry, and soft snow conditions is where this skin shines. The light and supple mohair plush makes you feel like you’re flying over the snow.
Why we love it: A gracefully fast ascent maximizes snowy face shots. Durability takes a small hit, but the phenomenal climbing efficiency makes for a full day of powder laps.
Price: 0.00$
The Pomoca Climb 2.0 is a versatile climbing skin, upgraded to be lighter, tougher, and more water-resistant with an easy-to-use attachment system.
Best versatile ski skin for backcountry beginners: These skins are the ultimate everyday choice for recreational skiers. Reliable, affordable, and a 70/30 mohair-nylon structure that hits the grip and glide sweet spot.
Why we love it: This skin has it all: grip and glide, value and performance, weight and packability. It’s no wonder it’s a fan favourite.
Price: 0.00$
Brand Name | Product Type
Brand Name | Product Type
The Pomoca Climb 2.0 is a versatile climbing skin, upgraded to be lighter, tougher, and more water-resistant with an easy-to-use attachment system.
Best versatile ski skin for backcountry beginners: These skins are the ultimate everyday choice for recreational skiers. Reliable, affordable, and a 70/30 mohair-nylon structure that hits the grip and glide sweet spot.
Why we love it: This skin has it all: grip and glide, value and performance, weight and packability. It’s no wonder it’s a fan favourite.
Price: 0.00$
Key Features to Consider When Choosing Ski Skins
Grip & Glide Balance: Tailoring to Your Terrain
The balance between grip and glide is crucial for backcountry skiing and varies depending on the terrain. Western Canada is known for its deep powder, so prioritize grip for secure ascents. In Eastern Canada, snow conditions can vary, so a versatile balance to handle both steep climbs and long traverses is a secure bet.
Size & Fit: Maximizing Performance
Proper sizing ensures optimal performance. Skins that match the width of your skis provide full coverage for grip while maintaining a sleek glide. Too narrow, and you’ll lose traction; too wide, and you risk unnecessary drag.
Adhesion: The Foundation of Uphill Success
Good adhesion is non-negotiable for successful climbs. Higher quality glue ensures skins stay in place during extended use, even in frigid or damp conditions. Look for skins with proven adhesive reliability to avoid frustration mid-ascent.
Durability: Withstanding the Backcountry Challenge
Backcountry skiing demands robust skins that can endure sharp rocks, abrasive ice, and varying weather. Synthetic materials tend to offer longevity, ensuring your skins stay reliable through season after season.
Weight & Packability: Essential for Multi-Day Expeditions
When tackling long climbs or multi-day trips, lightweight, packable skins reduce fatigue and save pack space. Consider compact designs that easily fold and fit into your backpack without adding bulk.
By focusing on these features, you’ll find the perfect pair of ski skins tailored to your backcountry style and environment.
How to trim your ski skins
In many cases, you may not need to worry about trimming. Manufacturers have increasingly been pre-cutting skins to match certain skis. First, check if there are pre-cut skins available for whatever ski or splitboard you have.
If pre-cut skins aren’t an option, you’ll need to trim your ski skins. This process is easier if the skins come with a cutting tool; most Black Diamond skins do. If your skin comes with tip and tail attachments that aren’t built, you’ll have to do that as well.
Tail Clips and First Attachments
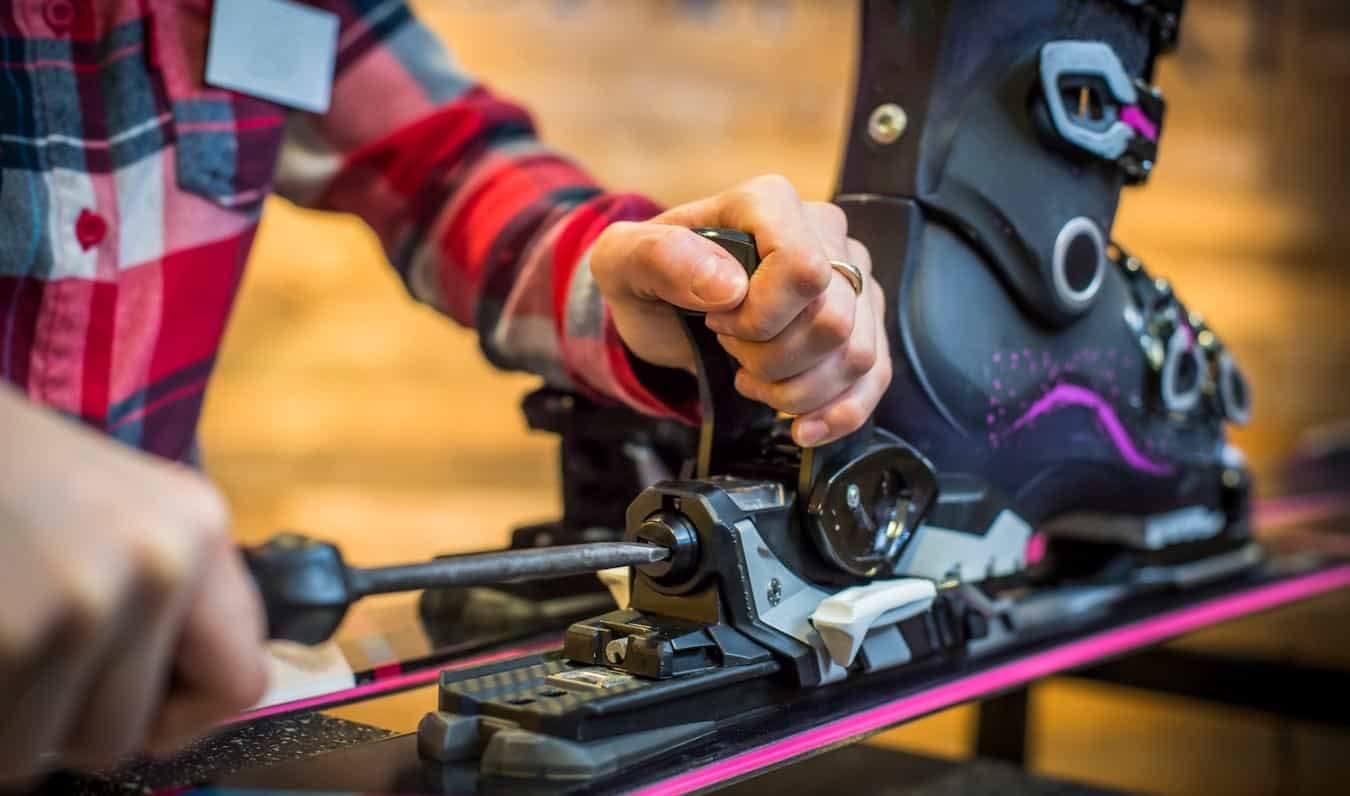
Attach the tail hardware first. This usually consists of a separate metal piece and a rubber ladder with different slots, kind of like notches on a belt. Put the metal piece into the fourth or fifth slot from the end of the skin and attach it to the end of the ski. Then, apply the skin (sticky side down) along the length of the ski. If the skin comes with a wrapper, peel it off to expose the sticky side.
Centre the Skin and Press Down
Make sure the skin is centred over the ski (it will be wider and longer than the ski if it’s uncut) and doesn’t have any air bubbles or pockets. You want a tight, taught fit. Press down along the length of the skin, one hand at a time to get the best fit.
If you trim without a skin smoothly attached to the ski, it could create strange cut angles that may not cover the ski properly. It’s ok to let the excess skin length drape over the end of the ski for the moment.
Trim the Length
Peel back the front of the skin to expose the tip of the ski. Attach the tip hardware loop over the head of the ski and make a mark on the ski where the bottom of the attachment sits. This mark lets you see where the climbing skins will need to be cut. Reattach the skin and cut across it at your mark. This will get rid of the excess length.
Tip Hardware and Tail Readjustment
Grab the tip hardware and slip it across the cut end of the skin. Make sure the attachment is as centred as possible. When the attachment is over the tip of the skin and centred, find the screw holes and put screws through them from the bottom up. The screws will pierce through the skin, which should secure the tip hardware to it.
When you’re done, cut off any extra length of the screws that stick out with a metal cutting device, or twist and break the ends off with a strong set of pliers. If you’re worried about jagged edges, you can sand down the screw nub until it’s flush with the rest of the attachment.
Now, unclip the tail end and peel off the skin. Slip the tip attachment over the ski, reattach the skin and run it down to the tail. This will allow you to see if the tail clip needs to be adjusted. If it does, move the clip up or down the rubber ladder until you find the right notch. You want a tight fit, but not so tight that it takes a ton of effort to put it on and take it off.
Trim the Sides
With both the tip and tail attachments done, it’s time to trim the sides. When trimming, cut off the excess fabric that drapes over each side of the ski. With an angled trimming tool, you can pick a direction and cut down the ski until with width of the skin matches the width of the ski.
Tapered Cut
The tapered cut involves shaping the now squared-off tip of your skin. You want to cut diagonally out from the edge of the tip attachment to the edge of the skin. Once you cut both sides, the front of the climbing skin will look like the head of a blunt arrow. This tapered cut exposes more of the ski base but also prevents unnecessary snow buildup that’ll occur if you have squared-off skins.
Fine Tuning Cuts
The last fine-tuning steps lock in the effectiveness of your skin. The ultimate goal is to have almost all of your ski base covered but your two metal edges exposed so they can also be used for added friction grip on a ski tour. Peel off and reposition the skin on your ski so that it’s roughly 2 mm off-centre. This can take a little time, so be patient and measure often.
Once the climbing skin is attached off-centre, cut the 2 mm overhung side. When you’re done, pull off the skin and reattach it as close to centre as possible. You should now be able to see both metal edges exposed.
Keep in mind that some pre-cut skins still need to be trimmed on the sides. Repeat the last step in the previous two paragraphs to get that perfect sidecut which will expose both metal edges. When you have a skin with both attachment points on, the right length to cover the base, and exposed metal edges, you’re ready to go.
How to attach your ski skins
Attaching ski climbing skins is relatively simple. The first time you open a new box, you’ll see that the adhesive side is covered by a wrapper. Attach the tip clip first so that the skin is attached to one point on the ski, and unroll the skin over the base of your ski while peeling back the wrapper. If there’s no wrapper, attach the tip clip and pull the skin to make it taut.
Slowly press down. The skin should connect with the ski base a few inches at a time. You do not want air bubbles or pockets because the skin won’t work as well. Methodically push down the skin while keeping the rest of it taut. This should yield something close to a vacuum seal between the skin and the ski.
Once the adhesive side is down along the length of the ski, there’s only one thing left to do. Grab the tail clip, which is usually adjustable, find the right setting and stretch the clip over the base of the ski. Attach the clip to the ski and run your hand over the skin to check for air pockets or instances where the skin goes over the edge of the ski.
If you find inconsistencies, pull the ski up and try again. If the alignment is good, the ski base is covered, and all tip and tail clips are working as they should, you’re done.
Ski Skin Maintenance
Moisture is the enemy. Keep your ski skins in a dry place to lock in the adhesive’s strength. In some cases, you can use an included piece of mesh to attach to the skins as you dry them. In others, it’s best to attach the adhesive sides to each other. This will largely depend on the manufacturer, so follow all included instructions. Visit our companion guide on proper ski skin maintenance.
Conclusion
With this information, you should be well on your way to choosing the perfect ski skins for your future backcountry adventures. Remember to follow the steps above to guarantee properly fitted, sized, and supportive skins. Stay safe out there, and happy skiing/riding!


